由于Swagger上线后需要关闭,直接注释掉@EnableSwagger2就可以了。
后面在hsweb群里咨询各位大神后,大神说用@Profile注解可以轻松实现。
Spring中的@Profile注解,可以实现不同环境(开发、测试、部署等)使用不同的配置。同样,除了使用注解也会给出基于XML配置的示例作为对比。
假设你有一个应用涉及数据库交互,你可能希望在开发环境上使用mysql数据库,在生产环境上使用oracle数据库,那么使用Spring的Profiles,可以轻松达到这个目的,接下来我们将给出一个实例详细介绍这种情况。
涉及技术及开发工具
- Spring 4.0.6.RELEASE
- Maven 3
- JDK 1.6
- Eclipse JUNO Service Release 2
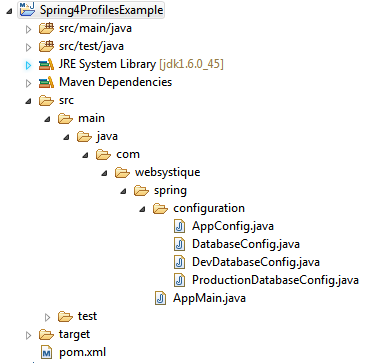
工程目录结构
步骤一:往pom.xml中添加依赖
<project xmlns="http://maven.apache.org/POM/4.0.0" xmlns:xsi="http://www.w3.org/2001/XMLSchema-instance"
    xsi:schemaLocation="http://maven.apache.org/POM/4.0.0 http://maven.apache.org/xsd/maven-4.0.0.xsd">
    <modelVersion>4.0.0</modelVersion>

    <groupId>com.websystique.spring</groupId>
    <artifactId>Spring4ProfilesExample</artifactId>
    <version>1.0.0</version>
    <packaging>jar</packaging>

    <name>Spring4ProfilesExample</name>

    <properties>
        <springframework.version>4.0.6.RELEASE</springframework.version>
    </properties>

    <dependencies>
        <dependency>
            <groupId>org.springframework</groupId>
            <artifactId>spring-core</artifactId>
            <version>${springframework.version}</version>
        </dependency>
        <dependency>
            <groupId>org.springframework</groupId>
            <artifactId>spring-context</artifactId>
            <version>${springframework.version}</version>
        </dependency>
        <dependency>
            <groupId>org.springframework</groupId>
            <artifactId>spring-orm</artifactId>
            <version>${springframework.version}</version>
        </dependency>

    </dependencies>
    <build>
        <pluginManagement>
            <plugins>
                <plugin>
                    <groupId>org.apache.maven.plugins</groupId>
                    <artifactId>maven-compiler-plugin</artifactId>
                    <version>3.2</version>
                    <configuration>
                        <source>1.6</source>
                        <target>1.6</target>
                    </configuration>
                </plugin>
            </plugins>
        </pluginManagement>
    </build>

</project>
步骤二:创建Spring配置类
Spring配置类是指用@Configuration注解标注的类,这些类包含了用@Bean标注的方法。这些被@Bean标注的方法可以生成bean并交由spring容器管理。
package com.websystique.spring.configuration;

import javax.sql.DataSource;

import org.springframework.beans.factory.annotation.Autowired;
import org.springframework.context.annotation.ComponentScan;
import org.springframework.context.annotation.Configuration;

@Configuration
@ComponentScan(basePackages = "com.websystique.spring")
public class AppConfig {

    @Autowired
    public DataSource dataSource;


}
以上配置只有一个属性被自动注入,接下来我们将展示这个dataSource属性可以根据不同的环境(开发环境或生产环境)注入不同的bean。
package com.websystique.spring.configuration;

import javax.sql.DataSource;

public interface DatabaseConfig {

    DataSource createDataSource();

}
一个简单的接口,可以被所有可能的环境配置实现
package com.websystique.spring.configuration;

import javax.sql.DataSource;

import org.springframework.context.annotation.Bean;
import org.springframework.context.annotation.Configuration;
import org.springframework.context.annotation.Profile;
import org.springframework.jdbc.datasource.DriverManagerDataSource;

@Profile("Development")
@Configuration
public class DevDatabaseConfig implements DatabaseConfig {

    @Override
    @Bean
    public DataSource createDataSource() {
        System.out.println("Creating DEV database");
        DriverManagerDataSource dataSource = new DriverManagerDataSource();
        /*
         * Set MySQL specific properties for Development Environment
         */
        return dataSource;
    }

}
package com.websystique.spring.configuration;

import javax.sql.DataSource;

import org.springframework.context.annotation.Bean;
import org.springframework.context.annotation.Configuration;
import org.springframework.context.annotation.Profile;
import org.springframework.jdbc.datasource.DriverManagerDataSource;

@Profile("Production")
@Configuration
public class ProductionDatabaseConfig implements DatabaseConfig {

    @Override
    @Bean
    public DataSource createDataSource() {
        System.out.println("Creating Production database");
        DriverManagerDataSource dataSource = new DriverManagerDataSource();
        /*
         * Set ORACLE specific properties for Production environment
         */
        return dataSource;
    }

}
以上两个配置类都实现了DatabaseConfig接口,特殊的地方在于它们都用@Profile标注。
被@Profile标注的组件只有当指定profile值匹配时才生效。
可以通过以下方式设置profile值:
1、设置spring.profiles.active属性(通过JVM参数、环境变量或者web.xml中的Servlet context参数)
2、ApplicationContext.getEnvironment().setActiveProfiles(“ProfileName”)
根据你的实际环境设置profile值,然后被profile标注(而且value=设置值)的bean才会被注册到spring容器。
步骤三:运行main方法测试
package com.websystique.spring;

import org.springframework.context.annotation.AnnotationConfigApplicationContext;

public class AppMain {

    public static void main(String args[]){
        AnnotationConfigApplicationContext  context = new AnnotationConfigApplicationContext();
        //Sets the active profiles
        context.getEnvironment().setActiveProfiles("Development");
        //Scans the mentioned package[s] and register all the @Component available to Spring
        context.scan("com.websystique.spring");
        context.refresh();
        context.close();
    }

}
注意以上代码,context.scan("com.websystique.spring")扫描到该包并开始注册所有被@Component标注的bean时,如果同时遇到被@Profile注解标注的bean时,会与profile值做比较,profile值匹配则注册到spring容器,否则直接跳过。
在我们这个例子中,DevDatabaseConfig会被注册到Spring容器中。
运行以上程序,结果如下:
Creating DEV database
附:基于XML的配置
替换DevelopmentDatabaseConfig配置为dev-config-context.xml (src/main/resources/dev-config-context.xml)
<?xml version="1.0" encoding="UTF-8"?>
<beans xmlns="http://www.springframework.org/schema/beans"
        xmlns:xsi="http://www.w3.org/2001/XMLSchema-instance"
        xsi:schemaLocation="http://www.springframework.org/schema/beans http://www.springframework.org/schema/beans/spring-beans-4.0.xsd">


    <bean id="dataSource" class="org.springframework.jdbc.datasource.DriverManagerDataSource">
        <property name="driverClassName" value="com.mysql.jdbc.Driver" />
        <property name="url" value="jdbc:mysql://localhost:3306/websystique" />
        <property name="username" value="myuser" />
        <property name="password" value="mypassword" />
    </bean>

</beans>
替换ProductionDatabaseConfig配置为prod-config-context.xml (src/main/resources/prod-config-context.xml)
<?xml version="1.0" encoding="UTF-8"?>
<beans xmlns="http://www.springframework.org/schema/beans"
    xmlns:xsi="http://www.w3.org/2001/XMLSchema-instance"
    xsi:schemaLocation="http://www.springframework.org/schema/beans http://www.springframework.org/schema/beans/spring-beans-4.0.xsd">

    <bean id="dataSource" class="org.springframework.jdbc.datasource.DriverManagerDataSource">
        <property name="driverClassName" value=" oracle.jdbc.driver.OracleDriver" />
        <property name="url"     value="jdbc:oracle:thin:@PRODHOST:PRODPORT/websystique" />
        <property name="username" value="myproduser" />
        <property name="password" value="myprodpassword" />
    </bean>

</beans>
替换AppConfig配置为app-config.xml (src/main/resources/app-config.xml)
<?xml version="1.0" encoding="UTF-8"?>
<beans xmlns="http://www.springframework.org/schema/beans"
        xmlns:xsi="http://www.w3.org/2001/XMLSchema-instance"
        xmlns:context="http://www.springframework.org/schema/context"
        xsi:schemaLocation="http://www.springframework.org/schema/beans http://www.springframework.org/schema/beans/spring-beans-4.0.xsd
                            http://www.springframework.org/schema/context http://www.springframework.org/schema/context/spring-context-4.0.xsd">


    <context:component-scan base-package="com.websystique.spring"/>

    <beans profile="Development">
        <import resource="dev-config-context.xml"/>
    </beans>

    <beans profile="Production">
        <import resource="prod-config-context.xml"/>
    </beans>

</beans>
根据实际的profile配置,相应的config-context.xml文件会被加载,其它的会被忽略。 最后,main方法如下:
package com.websystique.spring;

import org.springframework.context.support.AbstractApplicationContext;
import org.springframework.context.support.ClassPathXmlApplicationContext;

public class AppMain {

    public static void main(String args[]){
        AbstractApplicationContext  context = new ClassPathXmlApplicationContext("app-config.xml");
        //Sets the active profiles
        context.getEnvironment().setActiveProfiles("Development");
        /*
         * Perform any logic here
         */
        context.close();
    }

}
运行程序,会得到相同的结果。
程序源码
http://websystique.com/?smd_process_download=1&download_id=799
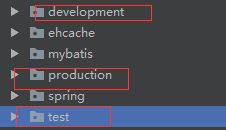
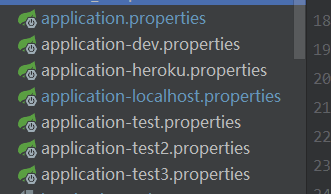
这样就可以了。各位Java大神纷纷贴出了自己项目中相关部分的结构。
例如:
或者启动的时候 加 -Dspring.profiles.active=Dev
如下分的更细一点。
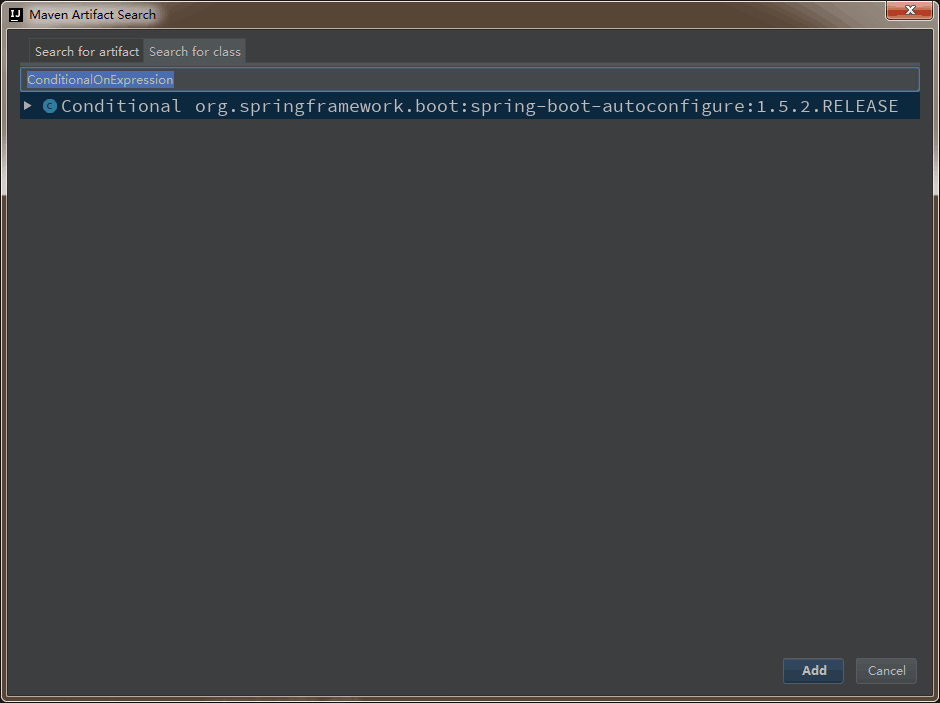
用SpringBoot项目的小伙伴,贴出了使用@ConditionalOnExpression注解,这样更简洁。
其实只是想实现一个开关而已。这样确实简单很多。
然后自己试了一下,发现SSM框架里没有这个注解。(无提示,在Spring Boot里面)
表示用开关的方式更加合理。
毕竟有些开发人员随便加依赖,最后搞的出来一些莫名其妙的问题,大家都懵圈。
于是乎,都纷纷躺枪了,这不就是在说自己吗?
@Profile注解确实强大,然后就作罢了,此问题告一段落。
自己默默的搜了一波@ConditionalOnExpression注解。找到如下:
想要实现的功能:
我想在配置文件中设置一个开关,enabled,在开关为true的时候才实例化bean,进行相关业务逻辑的操作。
具体实现:
1:要实例化的bean
2:配置类
代码:
想要实例化的bean: 在这个类上不要加@Component注解
public class OrderMessageMonitor {

    public OrderMessageMonitor(ConfigContext configContext) {
    ……

    }
    public doSomeThing() {
    }

}
配置类:
@Configuration
@ConditionalOnExpression("${enabled:false}")
public class BigpipeConfiguration {
    @Bean
    public OrderMessageMonitor orderMessageMonitor(ConfigContext configContext) {
        return new OrderMessageMonitor(configContext);
    }
}
后面发现Spring中存在@Conditional注解,那么是不是也可以实现这个功能呢?
Spring Boot的强大之处在于使用了Spring 4框架的新特性:@Conditional注释,此注释使得只有在特定条件满足时才启用一些配置。 下面来介绍如何使用Condition,首先写一个类:
package com.test.spring;

import org.springframework.context.annotation.Condition;
import org.springframework.context.annotation.ConditionContext;
import org.springframework.core.type.AnnotatedTypeMetadata;

public class MyCondition implements Condition
{
    /**
     * 这里写自己的逻辑,只有返回true,才会启用配置
     */
    public boolean matches(ConditionContext context, AnnotatedTypeMetadata metadata)
    {
        return true;
    }
}
接下来就可以使用了
package com.test.spring;

import java.io.Serializable;

import org.springframework.context.annotation.Bean;
import org.springframework.context.annotation.Conditional;
import org.springframework.context.annotation.Configuration;

@Configuration
@Conditional(MyCondition.class)
public class Config
{
    @Bean
    public Serializable createSerializable()
    {
        System.out.println("======000");
        return "";
    }
}
@Conditional(MyCondition.class)
这句代码可以标注在类上面,表示该类下面的所有@Bean都会启用配置
也可以标注在方法上面,只是对该方法启用配置
除了自己自定义Condition之外,Spring还提供了很多Condition给我们用
@ConditionalOnBean(仅仅在当前上下文中存在某个对象时,才会实例化一个Bean)
@ConditionalOnClass(某个class位于类路径上,才会实例化一个Bean)
@ConditionalOnExpression(当表达式为true的时候,才会实例化一个Bean)
@ConditionalOnMissingBean(仅仅在当前上下文中不存在某个对象时,才会实例化一个Bean)
@ConditionalOnMissingClass(某个class类路径上不存在的时候,才会实例化一个Bean)
@ConditionalOnNotWebApplication(不是web应用)
然后从这篇文章中发现SSM框架也是可以这样做的。
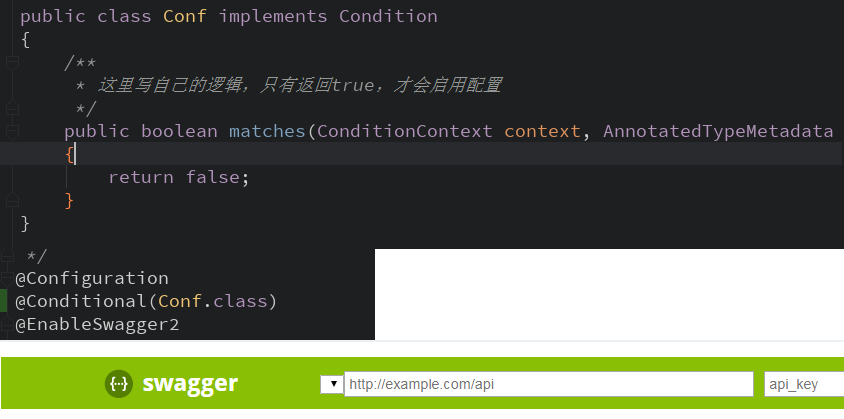
于是再项目中就用起来了,如下(分为三个图,上面是配置,中间@Conditional(Conf.class),下是Swagger启动后的情况,已经显示关闭Swagger了,与注释掉@EnableSwagger2效果一样):
这样Swagger就关闭了。可以做的更灵活些。
下面是Spring的一些注解。
AliasFor 在Spring4.2.x加入。给注解类中添加一个别名。参数annotation是指定给哪个注解类添加别名。参数attribute是目标注解类的参数。AliasFor既可以把本注解中的参数添加一个别名,也可以把别的注解的参数添加别名。通常可以在用一个注解类来整合多个的时候用。
DirtiesContext Spring用于单元测试的注解
Conditional 该注解是从Spring4.x开始加入的,使得程序可以在特定场景下加载特定的配置信息;用于可以给出一个条件判断的实现类。它可能需要配合接口org.springframework.context.annotation.Condition来使用。后面,有和它相关的注解类。
Transactional org.springframework.transaction.annotation.Transactional该类用于在类或者方法上描述事务的配置。Scheduled 从Spring3.x开始加入。被该注解标注的方法(所在类必须是被Spring容器所管理的)将会定时执行。支持cron、fixedDelay、fixedRate三种模式。它要求方法是没有参数和返回值的,如果有返回值的话也会被调度器所忽略。另外,它需要和注解EnableScheduling配合使用。
EnableScheduling 启用Spring的任务调度功能。从Spring3.1.x开始加入。
Async 被该注解标注的类或者方法将会变成异步调用,即调用后立即返回。需要和注解EnableAsync配合使用。
EnableAsync 启用异步调用功能。从Spring3.1.x开始加入。
Value 参数注入,例如:@Value(“${jdbc.driver}”)。这里是支持默认值的,例如:@Value(“${jdbc.username:root}”)。从3.0开始加入。
Rollback 在单元测试中用,和Transactional配合使用的话,能保证单元测试中的数据不会真正地入库。
SpringMVC
后面介绍有关SpringMVC中的注解类。
CrossOrigin org.springframework.web.bind.annotation.CrossOrigin用于解决Ajax异步请求跨域的问题
Controller 表明是一个Web请求服务,类似Struts中的Action
RestController 它是Controller和ResponseBody的集合
EnableBinding 该注解在SpringCloudStream中,是用来在多个service中通信的
RequestMapping 请求地址映射。参数method指定该请求的类型是GET还是POST或者其他的。从2.5开始加入。
GetMapping get方式请求
PostMapping post方式请求
PutMapping put请求
DeleteMapping delete请求
RequestParam 请求参数。
RequestBody 请求参数。
RequestAttribute
PathVariable 该注解加在参数上,表明该参数来自url请求路径中,例如:@RequestMapping(“/D/{deptId}/cost/models/{modelVersionId}”)。从3.0开始加入。需要注意的是,如果在url路径中有多个参数的话,需要指定参数名称,例如:@PathVariable(value = “modelVersionId”)。
SpringBoot
后面介绍有关SpringBoot中的注解类。
ConditionalOnBean 当上下文中存在某个bean时有效。该注解以及后面一些是springboot中的。
ConditionalOnClass 当类路径中存在某个类时有效。
ConditionalOnExpression 当表达式为true时有效。
ConditionalOnMissionBean 当上下文中不存在某个bean时有效。
ConditionalOnMissionClass 当类路径中没有某个类时有效。
ConditionalOnNotWebApplication 当不是web应用时有效。
SpringCloud
后面介绍SpringCloud中的注解类
FeignClient 使用该注解来申明一个Rest接口(实例应该是自动创建,例如由spring来自动注入)。如果Ribbon服务可用,则会负载后端的请求。参数url是一个绝对url地址,可以采用属性配置的方式,例如:${host}。参数configuration是带有注解@Configuration的配置类。
转自:
http://www.cnblogs.com/chenpi/p/6213849.html
